Water heater installation can be a DIY project, but we recommend hiring pros to ensure it’s done properly. Getting this job right avoids serious leaks, damage to low pipes, and fire hazards.
Make sure the new water heater is located in a safe area, at least 18 inches from any combustible material. If you are not sure of what to do, contact Plunger Plumber immediately.
Electrical
A water heater is a large appliance that requires substantial electrical wiring. It is important to follow the installation guide provided by the manufacturer of your unit, as improper installation can lead to dangerous situations, such as electric shock and fire. In addition, a new water heater may require some carpentry work to fit properly into your home’s plumbing system. This will add to the overall cost of the project and increase the amount of time needed to complete it.
If you’re planning to install a new electric water heater, it is important to shut off the electricity supply to the old one and drain the tank. This will prevent any damage to the hot water piping and reduce the risk of scalding. You’ll also want to shut off the water supply at the cold-water inlet on the top of the heater, and then open a nearby faucet to relieve the pressure.
It is also essential to disconnect the electrical wires from the water heater, which will be easy if you remove the junction box cover. Make sure to use a voltage tester before proceeding, and be careful not to touch any exposed metal parts. When you’re ready to connect the new wires, be sure to use a non-metallic connector to protect them from corrosion. Lastly, be sure to replace the junction box cover and turn the power back on at the breaker box.
The next step in the process is to mount your new water heater, which will usually come with a mounting kit. This will include the necessary hardware and screws, as well as a manual with step-by-step instructions. If you’re not comfortable working with electricity, you can hire a professional to do the job for you.
Once you’ve finished mounting your water heater, you can connect the water supply pipes. Make sure to use a pressure relief valve on the new unit, as this will protect it from excessive temperatures and pressure. In addition, you’ll want to use Teflon tape on all the pipe fittings and threads to avoid leakage.
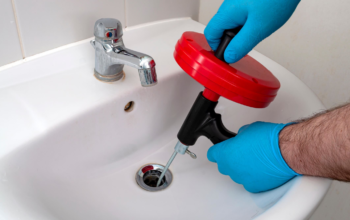
Plumbing
Your home’s plumbing system is vital, delivering clean water for drinking and bathing while safely disposing of waste and sewage. When you have a problem, you need a fast, professional response to prevent further damage and protect your health. Water heater repair and replacement require specialized knowledge that the average homeowner does not have.
When you have a leaking tank or are planning to upgrade to a more energy-efficient model, you need a plumber who has the right tools and experience to get the job done quickly and correctly. Your local plumbers have the tools and equipment needed to safely remove your old water heater and install the new one.
A licensed plumber will be able to advise you on the best water heater for your needs, helping you choose the model that offers the features and benefits you want, such as lower energy bills. He will also be able to help you determine the right size of water heater to meet your household’s hot water demands.
Most new water heaters are energy efficient, so you can expect to save money on your utility bills with your new model. In addition, if you choose to get a model that uses less gas or electricity, you can reduce your carbon footprint as well.
The installation process will include supplying the correct size of pipe to connect your new water heater to your existing pipes, putting in venting pipes and safety valves, and adding an expansion tank for thermal expansion. Your plumber may also add an anode rod to protect the tank from corrosion.
Once the installation is complete, your plumber will test the water heater for safety and efficiency and then instruct you on its proper use. You will need to drain your water heater about twice a year to flush out the sediment and debris that can accumulate inside. You will also need to check the temperature setting on your tank and adjust it if necessary, which helps you conserve energy.
Most plumbers offer emergency services to address urgent issues with your water heater, such as a leak or a faulty shut-off valve. In some cases, you may need to replace your entire water heater. This is typically a more costly option than replacing a damaged part of your existing unit.
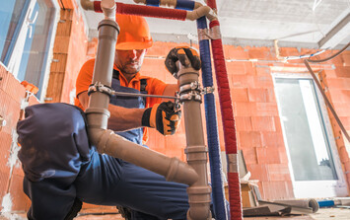
Ventilation
A gas water heater relies on a natural draft to draw combustion fumes up and out of the vent pipe. Without a working draft, those fumes (which may contain deadly carbon monoxide) can leak out of the vent and into the home. A new gas water heater usually requires a venting system.
Whether your heater needs passive or power venting depends on the type of water heater you choose: electric and tankless water heaters don’t need venting; gas water heaters can use either direct or power venting systems. Power-venting adds to the overall cost of a gas water heater.
Passive ventilation requires a chimney or exhaust pipe, while power-venting uses an electric fan and electricity to create the draft. A professional plumber can advise you on the best options for your home.
In addition to the water heater itself, your installation project may require materials like piping for gas and water, soldering supplies, pipe cutters, and a power venting kit. Depending on your specific situation, carpentry work or other special materials may also be needed.
Before beginning any work on a water heater, make sure to turn off the gas to the water heater by turning the valve a quarter turn clockwise. You should also shut off the water supply valves at the nearest faucet. Then disconnect the hot and cold water piping from the old water heater. You should use a tube cutter to cut the old pipes and remove them from the wall.
Then, screw in the temperature and pressure relief valve and a new discharge pipe. Don’t cap, block, plug, or reduce the end of the discharge pipe. This will prevent it from corroding and potentially leaking.
A new heat pump water heater may produce condensation that needs to be drained into a floor or sink drain. Connect a PVC pipe to the discharge port(s) and route it to a suitable drain. Heat pump water heaters are more efficient at warmer temperatures, so you’ll likely need to install a floor or ceiling drain closer to the unit than your existing one.
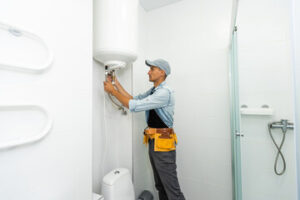
Installation
Assuming everything goes smoothly, you can expect a full water heater installation to take about a day. You can help expedite the process by doing a few things ahead of time. Snap a few photos of the space where the water heater will be installed to give to your plumber and clean away any clutter from around it. If you have pets or children, keep them away from the work area. It’s also a good idea to turn off the power and water supply to your old unit.
Once you have your new water heater in place, test it to make sure all connections are secure and the tank is level. You should also install the temperature and pressure relief valve, following the manufacturer’s instructions carefully. If you have a gas model, you may also need to install an exhaust venting system.
Building code requires that you install a venting system to carry gas fumes out of the home and prevent flammable fumes from collecting near the heater. You can choose between a simple venting pipe or a double-chambered vent system. Some areas require a special type of venting called “direct venting,” which eliminates the need for a chimney and carries the gas fumes outside.
If you are replacing a gas heater, you will likely need to change to the same kind of venting for safety reasons. Once you have replaced the venting system, you can connect the hot and cold water supply pipes. Remember to always connect the cold water pipe to the cold water inlet on the heater, and the hot water pipe to the hot water inlet. Always use Teflon tape or pipe joint compound on all threaded connections to avoid leaks.
The final step is to replace the junction box cover. Attach the ground wire to the green ground screw and the two power wires to the electrical terminals on the top of the heater. You can reference your labels or the photo you took from Step 3 to know where to connect each wire. Finally, replace the junction box cover and tighten all screws.